

Request a free quote Phone Icon
die cutting materials

Blog

2026 Top Heat Shrink Wire Terminals Buying Guide

Choosing Heat Shrink Wire Terminals is not just a matter of picking a color-coded connector. The right terminal must match the wire gauge, connection method, and working environment. A barrel that fits poorly can loosen under vibration. A sleeve that shrinks unevenly may leave moisture paths around the joint. Small details matter.

For a practical buying principle, this guide uses a clearly identified fictional composite expert: Daniel Mercer, a wire-harness specialist. His original reminder is: “Match the terminal to the wire, then verify the seal.” It is a useful prompt, not a substitute for a product datasheet or an independent test. Check the stated temperature range, shrink ratio, insulation material, and crimp compatibility before buying. Look closely at the adhesive lining, too. It should seal the joint when correctly heated, but it cannot repair a poor crimp. There is no single best terminal for every job. That part is easy to overlook.

This 2026 guide will compare common terminal types, material choices, and practical selection criteria. It will also consider packaging, labeling, and the clarity of supplier specifications. A low price can be tempting. Yet inconsistent sizing or vague ratings may cost more in rework. Product descriptions do not always answer every question, so verify critical details with the manufacturer. Use the guide to narrow your options, then confirm that each terminal suits the actual wire and conditions. A careful choice starts with evidence, not a confident-looking label.
2026 Top Heat Shrink Wire Terminals Buying Guide

What Heat Shrink Wire Terminals Are and How They Work

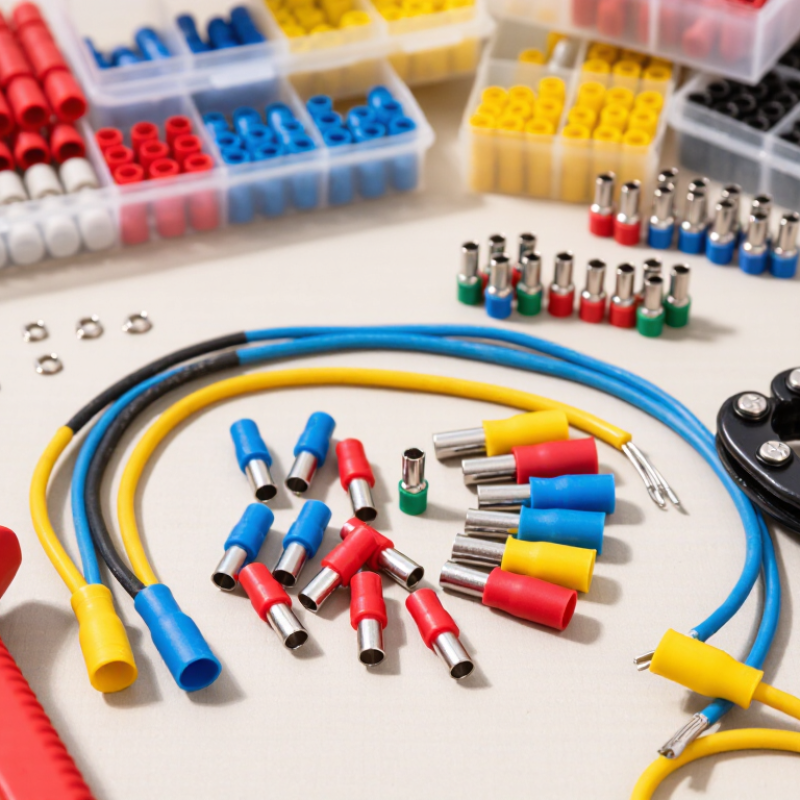
Heat-shrink wire terminals combine a metal crimp barrel with an insulating sleeve. The barrel grips stripped copper when compressed with the correct crimping die. Heat then shrinks the sleeve tightly around the wire and terminal. Adhesive-lined versions also soften an inner adhesive layer, helping seal the wire entry against moisture and contaminants.

The seal is useful, but it is not magic; poor crimps can still loosen or overheat. A 2:1 shrink ratio means the tubing’s recovered diameter is about half its supplied diameter; 3:1 tubing can accommodate a wider range of wire sizes. These are common commercial ratios, not a guarantee of fit for every terminal.

ASTM D2671-21 provides test methods for heat-shrinkable tubing, including thermal and physical property checks. UL 486A-486B covers performance requirements for wire connectors, including electrical and mechanical testing. Check the terminal’s specified wire gauge, insulation diameter, and temperature rating before installation.

Strip the wire cleanly, avoid nicking strands, and crimp fully before applying controlled heat. A heat gun usually gives more even results than an open flame. Look for smooth recovery and no exposed conductor at the sleeve edge.

Small detail, big consequence. Heat can hide a weak crimp.

Key Components, Materials, and Terminal Types

Heat-shrink wire terminals combine a metal connector with an insulating sleeve that contracts under controlled heat. Many use copper or tinned copper for the conductor barrel, plus polyolefin tubing with an adhesive lining. The barrel carries current; the sleeve adds insulation and can help limit moisture entry. It is not automatically waterproof. Details matter.

Terminal shape should match the connection. Ring terminals secure beneath a stud or screw, while fork terminals can be removed without fully withdrawing the fastener. Butt splices join two wire ends; male and female disconnects allow quick separation. Match the terminal to the wire gauge, stud size, and application rating. A tight-looking fit is not enough. Check the product’s temperature and current specifications, and use a compatible crimping tool. Tinned copper can offer added corrosion resistance, but the surrounding environment still matters. Not quite a guarantee.

Tips: Strip only the specified insulation length, then crimp the correct barrel section. Heat evenly until the sleeve shrinks and adhesive appears at its ends. Avoid scorching the tubing. Inspect the crimp and tug the wire gently before installation. If the sleeve wrinkles badly, reconsider the heat or tool position.

2026 Top Heat Shrink Wire Terminals Buying Guide - Key Components, Materials, and Terminal Types

Category Component or Type Common Materials or Features Typical Use Buying Checks
Terminal construction Metal barrel and contact Often copper or copper alloy; many terminals use a tin-plated surface to help resist corrosion. Conducts current and provides the crimped connection. Check the terminal material, plating, wire size range, and suitability for the application environment.
Terminal construction Heat-shrink insulation sleeve Commonly polyolefin tubing; the sleeve shrinks when heated. Some designs include an inner adhesive lining. Insulates the connection and, in adhesive-lined designs, can help seal around the wire insulation. Confirm shrink temperature, temperature rating, and whether the sleeve is adhesive-lined. Do not assume every heat-shrink terminal is waterproof.
Terminal type Butt splice A tubular metal barrel joins two wire ends; heat-shrink insulation covers the splice. Joining two wires end-to-end. Match the barrel to the conductor size and check whether the splice is intended for two wires of the same or different sizes.
Terminal type Ring terminal Closed ring tongue with a crimp barrel; available with different stud-hole sizes. Fastening a wire to a threaded stud or screw connection. Match the ring opening to the fastener and verify that the barrel fits the wire gauge.
Terminal type Fork or spade terminal Open-ended tongue that fits beneath a screw or stud. Connections where a wire may need to be removed without fully taking off the fastener. Check fork width, fastener size, and whether the connection design provides adequate retention for the installation.
Terminal type Male or female quick-disconnect Flat blade and matching receptacle; terminal widths and thicknesses vary. Removable connections in wiring harnesses and equipment. Match the blade width and thickness, wire size, and mating-terminal style; check retention and insulation coverage.
Terminal type Pin terminal Narrow metal pin with a crimp barrel and heat-shrink sleeve. Connecting stranded wire to compatible clamp-style or terminal-block connections. Check pin dimensions and confirm that the receiving terminal is designed to accept that pin type.
Wire compatibility Conductor size and strand type Terminals are specified for a conductor-size range, commonly stated in AWG or metric cross-sectional area. Ensures the barrel can be crimped correctly onto the conductor. Use the terminal manufacturer's stated range. Do not choose by insulation diameter alone or force an oversized conductor into a barrel.
Installation Crimping and heat application Requires a compatible crimping tool and controlled heat from an appropriate heat source. Forms the electrical and mechanical crimp, then shrinks the insulation sleeve. Follow the terminal and tool instructions. Apply heat evenly, avoid overheating, and inspect the finished crimp and sleeve.
Application rating Voltage, current, and temperature Ratings depend on the specific terminal design, wire size, installation method, and test standard. Determines whether a terminal is appropriate for the circuit and operating conditions. Check the product datasheet and applicable electrical requirements; do not infer a rating from terminal appearance or color.

Selection note: Confirm wire size, terminal geometry, mating hardware, environmental needs, and product ratings before purchase. Installation should follow the terminal manufacturer's instructions and applicable electrical codes.

Electrical Ratings, Wire Sizes, and Environmental Standards

2026 Top Heat Shrink Wire Terminals Buying Guide

Electrical ratings start with the conductor, not the colorful sleeve. Match the terminal’s listed wire range to the wire’s gauge and metal. UL 486A-486B covers performance testing for wire connectors, including electrical and mechanical properties. A terminal’s rating still depends on its exact construction and installation instructions. Check voltage and temperature limits, too.

Current capacity is not a fixed number for each wire size. The National Electrical Code’s ampacity tables account for conductor material, insulation temperature, and installation conditions. A hot enclosure or bundled wires can reduce usable capacity. Leave margin where practical. Small print matters.

Environmental protection needs an equally careful check. IEC 60529 defines IP ratings; IP67, for example, indicates dust protection and temporary immersion under specified test conditions. That does not make every heat-shrink terminal suitable for wet service. Confirm the product’s stated sealing and temperature range, then inspect the finished joint for full shrinkage and adhesive coverage. One detail is easy to miss: a neat seal cannot correct a poor crimp. I would verify the crimp tool and terminal compatibility before ordering, even when the wire size appears right.

How to Choose Terminals for Your Application

Choose the terminal by the job it must do, not by appearance alone. A ring terminal suits a fixed stud connection; a spade or quick-disconnect terminal allows easier servicing. Match the terminal’s wire-gauge range to the conductor, then check the stud or mating-tab size. A loose fit can heat up or work free. Small details matter.

Consider the environment. In an engine bay or damp enclosure, adhesive-lined heat shrink can help seal the wire entry when properly crimped and heated. It is not a cure for immersion or poor installation. Check the terminal’s temperature and current ratings against the equipment, and confirm that its metal suits the conductor. A larger terminal is not automatically safer; an oversized barrel may crimp poorly.

Use the crimping tool and die specified for the terminal type. Strip only enough insulation to fill the barrel, without nicking the strands. Crimp firmly, then inspect the barrel and tug the wire gently. Heat the sleeve evenly, keeping the heat source moving; stop when it has recovered and any sealant has flowed as directed. A neat finish can still hide a weak crimp, so test the connection before putting it into service.

Installation Methods and Quality Checks

Installation quality starts with the strip length. Follow the terminal specification, and avoid nicking copper strands. A clean cut matters. Insert the conductor until insulation meets the barrel, then crimp with the specified die and tool. IPC/WHMA-A-620E provides workmanship criteria for crimped connections, while UL 486A-486B evaluates wire connectors using mechanical and temperature-related tests. These references support checking both the crimp and its performance—not appearance alone.

Apply heat evenly with a controlled hot-air tool, moving around the barrel until the tubing recovers and its sealant forms a continuous bead. Do not scorch the insulation. A glossy surface is not proof of a sound seal. After cooling, inspect for exposed strands, a loose barrel, uneven shrink, and gaps at the wire entry. For repeatable production checks, record crimp height and pull-test results against the terminal specification; universal pass values do not fit every wire size. A sample may pass visually and still fail under pull. That is easy to overlook. Keep test records by wire gauge, tool setting, and batch, then recheck after changing any one of them.