

Request a free quote Phone Icon
die cutting materials

Blog

How to Crimp Butt Connectors Properly?

A secure electrical connection depends on more than squeezing a tool. Crimping Butt Connectors properly means matching the connector to the wire, stripping insulation cleanly, and applying even pressure with a suitable crimper. A loose crimp can pull free; an overworked one may damage the conductor. Neither is easy to spot by appearance alone.

This guide explains how to choose the right butt connector, prepare stranded wire, and position each connection in the crimper. You’ll also learn how to check the finished joint with a gentle pull test and inspect for exposed strands or damaged insulation. Small details matter. A few millimeters of excess bare wire can leave copper exposed, while insulation caught beneath the barrel can weaken the contact.

Tool fit matters, too. A ratcheting crimper and a connector designed for the wire gauge can make consistent results easier, but they do not replace careful inspection. Even experienced hands can rush a step. I’ve found that pausing to check the wire size and crimp position is worthwhile, though it can feel overly cautious. The goal is a firm, clean connection—not simply a flattened barrel.
How to Crimp Butt Connectors Properly?

Identify the Correct Butt Connector and Crimping Tool

How to Crimp Butt Connectors Properly?

Identify the Correct Butt Connector and Crimping Tool

Choose a butt connector that matches both the wire gauge and the wire type. The conductor should fit inside the barrel without forcing or excessive looseness. Check the connector’s stated range; color alone is not a reliable size guide. A connector designed for stranded wire may not suit every solid-wire application. Also consider the working environment: moisture or vibration may call for a connector with suitable insulation and sealing.

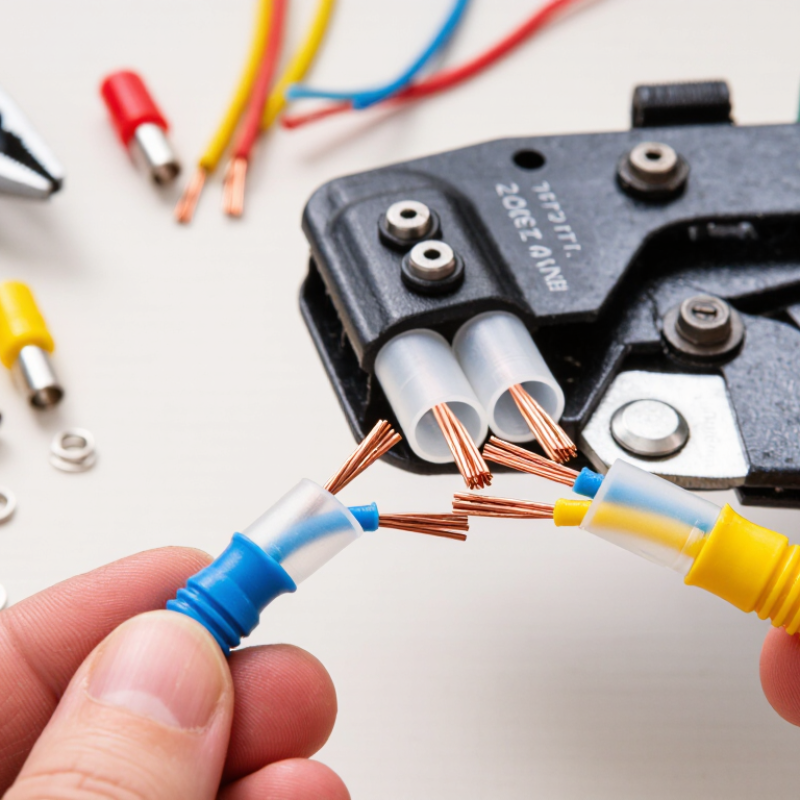
Select a crimping tool with a die marked for the connector’s size and style. A ratcheting tool can help apply consistent pressure, but correct die selection still matters. Strip only enough insulation for the conductor to reach the barrel’s center. Insert each wire fully, then position the die over the metal barrel—not the insulated sleeve. Crimp firmly, following the tool’s instructions. The first attempt can feel deceptively easy.

Prepare the Wires for the Connection

How to Crimp Butt Connectors Properly?

Prepare the Wires for the Connection

A reliable crimp starts before the connector touches the tool. Cut each wire squarely, then check that its gauge matches the connector’s marked range. A loose fit can pull out; an oversized wire may not enter fully. The IEC 60352-2 standard evaluates crimped connections using mechanical and electrical tests, underscoring why correct wire and connector matching matters.

Strip only enough insulation to fill the metal barrel. Use the connector’s specified strip length when available; there is no universal length for every butt connector. A ruler helps. Keep the copper strands together, and inspect the stripped end under bright light. Nicked strands reduce the conductor’s effective cross-section. Remove the damaged section and strip again. It takes a few seconds.

Keep insulation out of the barrel, but do not leave bare copper exposed beyond it. If the wire has been exposed to moisture or grease, clean and dry it before crimping. Follow the connector manufacturer’s instructions for wire size and strip length, alongside the workmanship criteria in IPC/WHMA-A-620. One small oversight: twisted strands can hide a short strip or a damaged conductor. Check the end before insertion, even when the wire looks tidy.

Prepare the Wires for a Butt Connection
Approximate copper conductor area increases as the AWG number decreases. Check the connector’s stated wire-size range, strip each wire to the specified length, and keep all conductor strands together before crimping.

Insert the Wires into the Connector

How to Crimp Butt Connectors Properly?

Insert the Wires into the Connector

Before inserting anything, disconnect power and check that the wire gauge matches the connector’s marked range. Strip only enough insulation to reach the metal barrel’s full length. Too little exposed copper may weaken the connection; too much can leave bare wire outside the sleeve. Small details matter.

Twist stranded wire gently so loose strands stay together, then slide it into one end of the connector until the insulation meets the barrel. Copper should fill the metal section without folding back or protruding from the opposite end. Repeat on the other side. If the wire stops early, do not force it; check for bent strands or an incorrect strip length. I’ve found that rushing this step is an easy way to hide a poor connection inside the sleeve.

Crimp Each End with Even Pressure

How to Crimp Butt Connectors Properly?

Crimp Each End with Even Pressure

A reliable butt splice depends on two consistent crimps, not one hard squeeze. Strip each wire to the connector’s specified length, keeping copper strands together and insulation outside the barrel. Insert the first wire until its strands reach the connector’s center stop. Place the barrel squarely in the matching die. Squeeze the ratcheting tool through its full cycle. One smooth motion matters. A partly closed crimp can leave strands loose, while using the wrong die may deform the barrel.

Repeat on the opposite end with the same tool setting and hand pressure. Check that neither wire slips when gently tugged, and inspect both ends for exposed strands, cracked insulation, or an uneven barrel. NASA-STD-8739.4A, a workmanship standard for crimped electrical interconnections, uses controlled crimping and inspection criteria rather than one universal force for every connector. That distinction matters: acceptable crimp dimensions and pull strength depend on the wire and terminal combination. Follow the connector maker’s specifications, and use a calibrated pull tester when the job requires documented verification.

A small flaw can hide. I’ve found that rushed strip lengths are easy to miss under workshop lighting. Mark the strip length or use a gauge, then compare both crimps side by side before insulating the joint.

Inspect and Test the Finished Connection

After crimping a butt connector, inspect it under bright light before applying power. The metal barrel should sit evenly, without splits, sharp folds, or deep cuts. Check both ends: insulation should stop near the barrel, while conductor strands should not protrude or remain exposed beyond the crimp. Look closely. Give each wire a firm, gentle pull. A wire that slides out is a failed connection, even if the sleeve looks tidy. Avoid pulling hard enough to damage a sound lead. If the crimp is loose or distorted, cut it off and use a new connector; a compressed barrel cannot be reliably crimped again.

Testing adds evidence that appearance cannot provide. With the circuit de-energized, use a meter’s continuity function to check for an open circuit, following the meter instructions. Then, where safe and appropriate, power the circuit and measure voltage drop across the connection under its normal load. A high reading may point to poor contact, unsuitable wire, or an inadequate crimp. A continuity beep alone does not prove a strong joint. Keep probes steady and compare readings with expected values. It is tempting to stop at a tidy appearance, but that shortcut deserves a second thought: vibration can expose a weak connection that looked fine on the bench.

How to Crimp Butt Connectors Properly? - Inspect and Test the Finished Connection
Inspection Point How to Check Acceptable Result If It Fails
Connector and wire match Check the connector’s stated wire-size range and insulation type against the wire being used. Both conductors are within the connector’s specified range, and the connector is suitable for the application. Replace with a correctly sized connector; do not compensate by adding strands or forcing oversized wire into the barrel.
Strip length and strands Compare the stripped length with the connector’s barrel depth or specified strip-length guidance. Inspect the wire end before insertion. The conductor reaches the barrel’s center stop, if present; no strands are cut, missing, or folded back. Cut back and strip the wire again. Replace any conductor with damaged or missing strands.
Conductor insertion Before crimping, confirm each wire is fully inserted into its own end of the butt connector. The conductor is seated in the metal barrel, with no loose strands outside it. Insulation does not extend into the conductor-crimp area. Reposition the wire before crimping. If the connector has already been crimped, replace it rather than reusing it.
Crimp placement and tool Use a crimping tool and die intended for the connector type and wire size. Check that the crimp is made on the metal barrel, not the insulated sleeve. The barrel is compressed evenly and securely, without cracks, sharp burrs, or obvious off-center deformation. Replace the connector and recrimp with the correct tool and die. Do not use pliers as a substitute for a proper crimping tool.
Insulation support and seal Inspect both ends and, for heat-shrink connectors, apply controlled heat according to the connector instructions. Insulation is supported without being trapped in the conductor crimp. Heat-shrink material is evenly recovered; any adhesive seal is continuous and appropriate for the connector design. Replace connectors with split, scorched, or poorly sealed insulation. Use a suitable connector for the moisture or environmental exposure.
Visual finish Rotate the connection and examine the barrel, insulation, and wire exits under good lighting. No exposed loose strands, cracked barrel, melted insulation, corrosion, or sharp edges that could damage nearby wiring. Replace the connector if damage or an unreliable crimp is visible; do not cover defects with tape or additional tubing.
Gentle tug check With power disconnected, apply a firm, controlled pull to each wire separately. Avoid jerking or pulling hard enough to damage the wire. Neither wire slips or pulls out of the connector. This is a screening check, not a substitute for a specified mechanical pull test. Cut out and replace the connector, then inspect the wire size, strip length, die, and crimping technique.
Continuity test With the circuit de-energized and isolated, use a multimeter in continuity or resistance mode across the joined conductors. The circuit is continuous, and the reading is stable when the wires are gently moved. Compare resistance with the test-lead baseline and circuit requirements. Check probe contact and circuit isolation first. If the connection remains intermittent or open, replace and recrimp it.
Voltage-drop check under load For a powered circuit, measure across the connection while it carries its normal operating load, following safe electrical procedures. Voltage drop is within the circuit’s design or applicable specification and remains stable. There is no abnormal heating during operation. De-energize the circuit and inspect the crimp, wire size, and load. Do not rely on a continuity test alone to assess a high-current connection.
Documented pull test (when required) Use a calibrated force gauge or approved test fixture when the application, quality plan, or governing standard calls for a pull test. The measured force meets the requirement for the specific wire size, connector, and applicable specification. There is no single universal pull-force limit for all butt connectors. Quarantine the failed sample, review the crimp process, and follow the applicable acceptance criteria before approving production work.