

Request a free quote Phone Icon
die cutting materials

Blog

7 Tips for Choosing the Best Rod Heaters?

Choosing the right Rod Heaters starts with the process, not the product page. A heater that works well in a compact aluminum die may struggle in a thick steel plate. The difference often comes down to watt density, fit, operating temperature, and heat loss. Small details matter. A loose bore can slow heat transfer, while poor temperature control can create hot spots and shorten service life.

Heat-transfer scholar Dr. John H. Lienhard IV’s work offers a useful engineering reminder: evaluate how heat moves through the actual system. That is a paraphrase of a technical principle, not a direct quotation. For a real purchase, verify recommendations against the heater maker’s specifications and your equipment’s operating conditions.

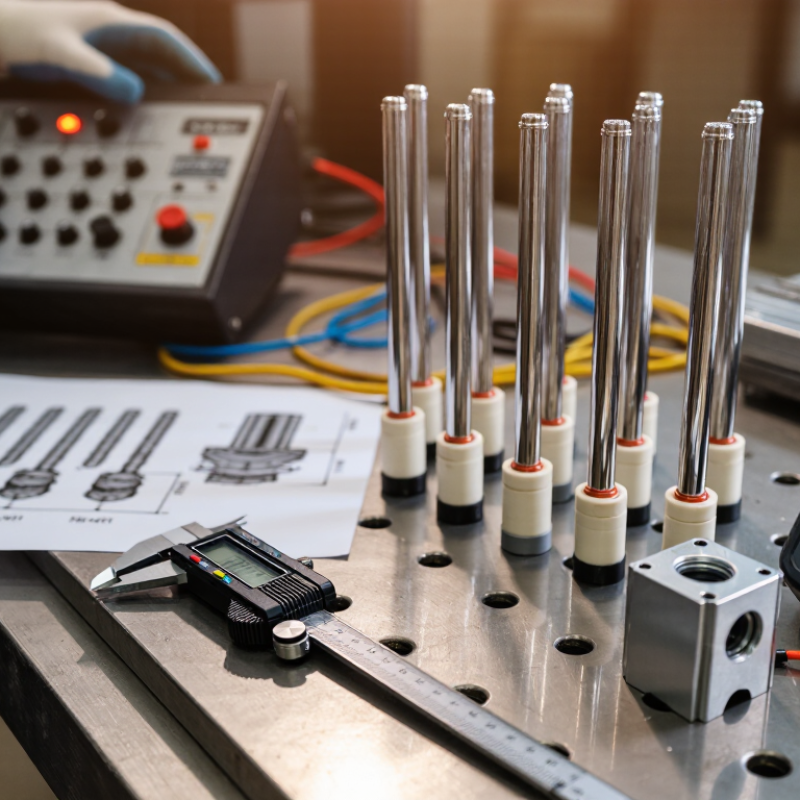
This guide covers seven practical checks for comparing Rod Heaters. It looks at material compatibility, dimensions, wattage, temperature limits, controls, installation, and supplier support. A caliper, a drawing, and a clear temperature target can prevent costly guesswork. Yet specifications do not tell the whole story. Cycle time, surrounding insulation, and the part’s changing load can all affect performance. Measure carefully. Ask questions. Recheck assumptions.

The best choice is not always the most powerful or the least expensive. It is the heater that delivers stable, even heat within the limits of the application. Use these tips as a starting point, then confirm critical details with a qualified heating professional and the manufacturer.
7 Tips for Choosing the Best Rod Heaters?

How Rod Heaters Work and Where They Are Used

7 Tips for Choosing the Best Rod Heaters?
How Rod Heaters Work and Where They Are Used

A rod heater turns electrical energy into heat through resistance. Current passes through a resistive element, often surrounded by ceramic insulation and a protective metal sheath. The sheath transfers heat to a nearby metal block, liquid, or surface. In a mold, for example, a tightly fitted heater warms the steel from inside. Contact matters. A loose fit can create hot spots and shorten service life.

Rod heaters are common in plastic-processing molds, dies, packaging equipment, and laboratory instruments. Some designs heat tanks or pipes when their construction suits the fluid and operating conditions. The U.S. Department of Energy’s 2015 Quadrennial Technology Review estimated that process heating accounted for about 36% of U.S. manufacturing energy use. That figure covers many heating methods, not rod heaters alone, but it shows why temperature control and insulation matter in industrial settings.

Choosing a heater means matching its diameter, length, watt density, and operating temperature to the equipment. A small change in fit can make a real difference. Measure the bore, check the material’s temperature limits, and consider how heat escapes during production. This is easy to overlook. A heater may reach its setpoint while the workpiece stays unevenly warm. That mismatch deserves a second look.

7 Tips for Choosing the Best Rod Heaters: How They Work and Where They’re Used

How to read the chart: Current is calculated as power divided by voltage for example heater ratings on a 230 V supply. These are illustrative electrical calculations, not product specifications. Rod heaters convert electrical energy into heat, which transfers through the heater sheath to the surrounding material. They are commonly used in dies, molds, packaging equipment, and other metal parts.

Selection tips: 1) Check the supply voltage. 2) Calculate the required power for the application. 3) Match the heater’s length and diameter to the bore. 4) Check the material and operating-temperature limits. 5) Choose a suitable watt density to avoid overheating. 6) Ensure good contact and proper installation. 7) Use appropriate temperature controls and over-temperature protection.

Define Your Heating Needs and Operating Conditions

Before selecting a rod heater, define what must be heated, how quickly, and how evenly. A metal block, liquid tank, and moving production line place very different demands on the same heater. Record the material, dimensions, target temperature, warm-up time, and acceptable temperature variation. Then check the real operating conditions: supply voltage, available space, airflow, moisture, vibration, and nearby surfaces. Small details matter. A heater that fits on paper may struggle when insulation is thin or the process cycles frequently.

Duty cycle deserves special attention. Continuous operation, short bursts, and frequent starts affect element life and energy use differently. The U.S. Department of Energy’s 2015 Quadrennial Technology Review identifies process heating as about 36% of U.S. manufacturing energy use, underscoring why a realistic heat-load estimate matters. Do not choose wattage from the workpiece alone; include heat loss through fixtures, tanks, and exposed surfaces. Measure where the heat is needed, not just where a sensor is easiest to install. That distinction is easy to miss.

Finally, define the control and safety requirements before comparing heater dimensions. Note the sensor location, temperature limit, and consequences of overshoot. Check the equipment manufacturer’s published limits for sheath temperature and installation conditions. One honest caveat: early heat-loss estimates are often rough. Validate them with operating measurements, then revise the specification rather than treating the first calculation as certain.

Compare Heater Materials, Sizes, and Configurations

Rod heaters differ in sheath materials, dimensions, and shape, so compare these before choosing.

Tip 1: Match the sheath to the environment. Stainless steel often suits general service, while higher-temperature alloys may be appropriate for demanding heat.

Tip 2: Consider moisture and process materials; corrosion resistance matters as much as temperature rating.

Tip 3: Check the heater’s watt density against the material being heated. Too much concentrated heat can damage sensitive surfaces. Specifications vary, so verify the intended operating conditions.

Tip 4: Measure the heated space and available insertion depth, not just the overall equipment size. Measure twice. A rod that is too long may obstruct moving parts; one that is too short may leave cold spots.

Tip 5: Compare configurations. Straight rods suit open, linear spaces, while U-shaped or formed elements can cover more area when clearance allows. Fit matters. Leave enough room for installation and expansion.

Tip 6: Confirm mounting style, terminal position, and electrical requirements against the equipment documentation.

Tip 7: Choose a size and configuration that allow practical inspection and replacement. A compact layout can look efficient, but it may be awkward to service later. That detail is easy to overlook. Ask a qualified supplier or technician to check material, temperature, voltage, and fit before installation.

Check Power Ratings, Temperature Control, and Safety Features

A rod heater’s power rating should match the volume and material you need to heat, not simply be the highest number available. Check the manufacturer’s capacity guidance, then consider heat loss from drafts, insulation, and frequent opening. A unit working near its limit may struggle to hold a steady temperature. Too much power can also create sharp temperature changes in a small space. A chart is only a starting point. Real conditions vary.

Temperature control matters just as much as wattage. Look for an adjustable thermostat with a clear scale, and check whether the sensor sits near the heated area. A poorly placed probe can read the wrong temperature. If accuracy matters, compare its reading with a separate thermometer during a test run. Small details matter. Safety features deserve a close look: overheat protection, a sturdy insulated casing, secure wiring, and suitable protection against moisture. Keep the heater clear of flammable materials, and follow its installation instructions. I would not assume that a built-in shutoff makes every setup safe; inspect the cord and housing regularly for wear.

7 Tips for Choosing the Best Rod Heaters? - Check Power Ratings, Temperature Control, and Safety Features

Tip What to Check Practical Guidance Why It Matters
1. Match the power rating to the heating load Rated wattage, voltage, warm-up time, and heat losses Estimate the energy needed using energy = mass × specific heat capacity × temperature rise, then account for warm-up time and heat lost to the surroundings. Confirm that the supply voltage matches the heater rating. Have an engineer check the sizing for critical or high-power applications. An undersized heater may not reach the target temperature; an oversized one can cause rapid cycling, hot spots, or excessive electrical demand.
2. Check the operating temperature and sheath limit Process temperature, maximum sheath temperature, and heat-transfer conditions Choose a heater rated for the required process temperature and verify the permitted sheath temperature in the actual medium and installation. Follow the heater manufacturer's limits; temperature capability varies by construction, watt density, and operating conditions. The process temperature and the heater surface temperature are not the same. Exceeding the sheath limit can shorten service life or damage nearby materials.
3. Select suitable temperature control Thermostat or controller, sensor type, sensor position, and control accuracy Use a controller compatible with the heater and sensor. A properly configured PID controller can help maintain a stable setpoint; locate the sensor where it measures the process temperature rather than an unrepresentative hot spot. Good sensing and control help limit temperature swings and reduce the risk of overheating the process or heater.
4. Include independent overtemperature protection High-limit thermostat, thermal cutout, or other independent safety control For applications where overheating could cause injury, fire, or equipment damage, use a suitable high-limit device in addition to normal process control. Set and install it according to the equipment instructions and applicable codes. A separate limit can interrupt heating if the primary controller or sensor fails.
5. Verify material and environmental compatibility Sheath material, process medium, corrosion exposure, and ambient conditions Confirm that the sheath and seals are compatible with the liquid, gas, or surrounding environment, including any cleaning chemicals. Review moisture, dust, and corrosion exposure when choosing the enclosure and terminal protection. An incompatible material or poorly protected connection can corrode, leak, or fail prematurely.
6. Confirm fit, mounting, and heat transfer Rod length, diameter, insertion depth, clearance, and mounting method Check the available space, required insertion depth, mounting arrangement, and manufacturer-specified clearances. Ensure the heater is installed in the intended medium and has the required contact or circulation for heat transfer. Poor fit or inadequate heat transfer can create localized overheating and may make installation or maintenance difficult.
7. Review electrical and installation safety Grounding, current rating, wiring, enclosure protection, and applicable approvals Have a qualified person verify that the circuit, overcurrent protection, wiring, grounding, and enclosure are appropriate for the heater and installation environment. Check relevant local electrical codes and required product approvals before purchase. Correct electrical design and installation reduce the risk of electric shock, fire, and equipment failure.

Note: Heater ratings, temperature limits, materials, and installation requirements vary by model and application. Confirm all specifications with the product documentation and a qualified professional.

Assess Installation, Maintenance, and Long-Term Costs

A rod heater can look simple on a specification sheet, yet installation conditions often determine how well it performs. Measure the available bore or mounting space, including room for wiring and removal. Check that the heater’s diameter, heated length, voltage, and wattage match the equipment and process. A close fit is not always a better fit; expansion and service access matter. Small details matter. Have a qualified technician verify electrical connections, grounding, and temperature controls before operation.

Maintenance needs vary with the material being heated and the surrounding environment. Dust, oil, or residue can collect around connections and reduce heat transfer. Schedule inspections based on actual operating conditions, not just a convenient calendar interval. Look for discolored terminals, loose wiring, cracked insulation, or uneven heating. Keep a record of readings and repairs. It may feel excessive at first, but those notes can reveal a gradual change before an unexpected shutdown.

Compare long-term costs, not only the purchase price. Energy use depends on heater output, run time, insulation, and control accuracy. A correctly sized unit may avoid unnecessary cycling, while poor process fit can waste power or shorten service life. Include installation labor, replacement access, spare parts, and downtime in the estimate. Not every setup fits. If removal requires dismantling nearby equipment, a cheaper heater could cost more over time. Some estimates remain imperfect until real operating data is available, so revisit them after the first maintenance cycle.